Install Ubuntu in your Virtual Machine
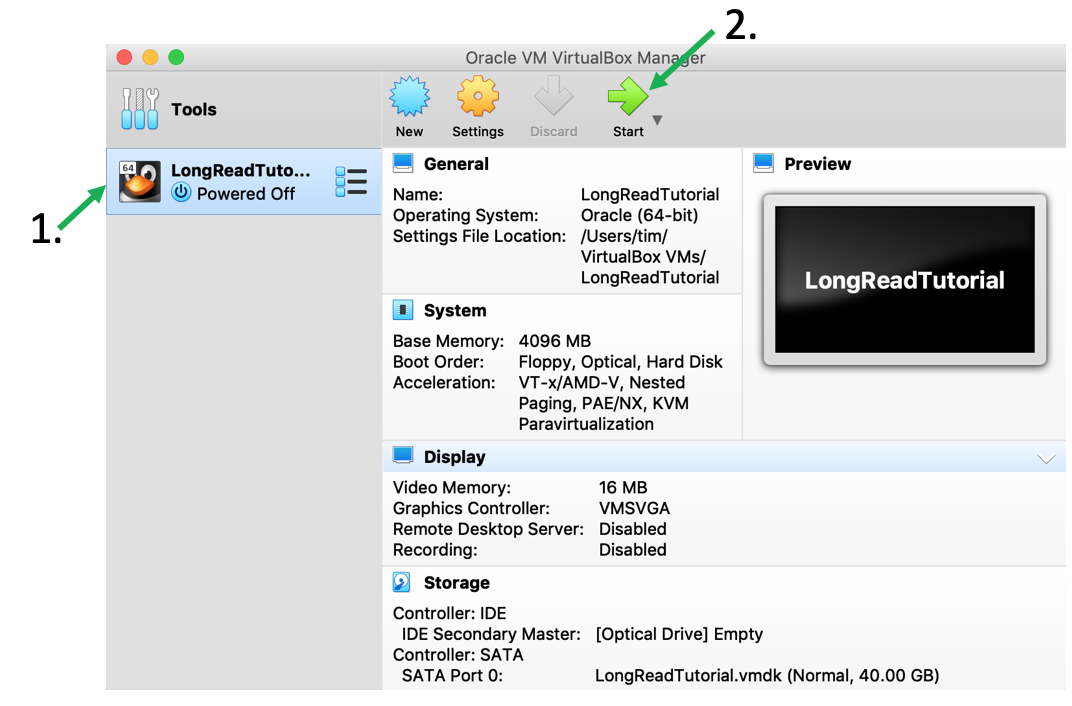
Your newly created Virtual Machine (VM) should appear in VirtualBox in the menu on the left. Select the VM by clicking on it in the menu and then start it up.
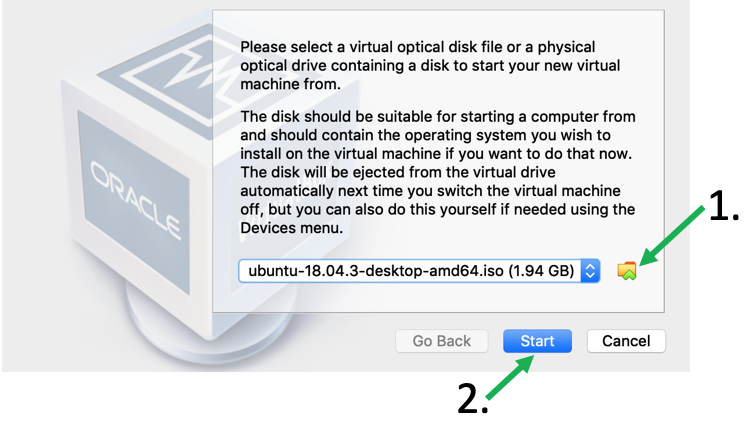
In the new window choose the downloaded Ubuntu iso file and press “Start”
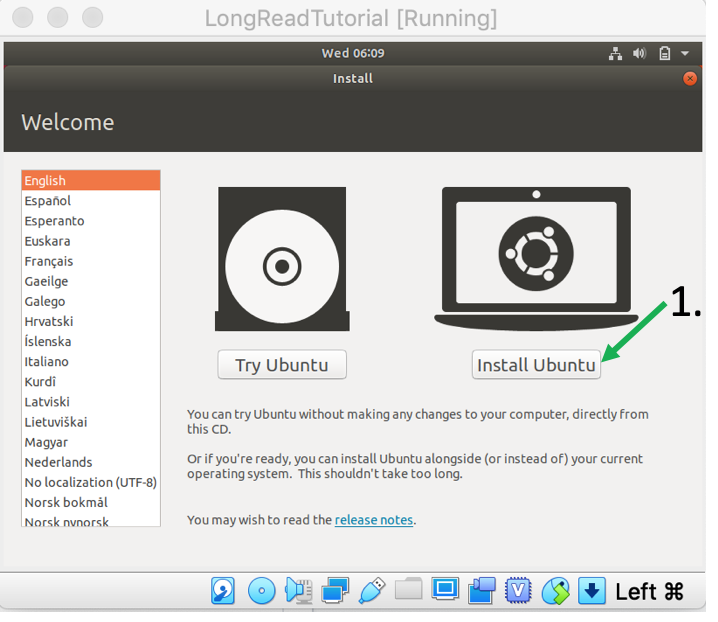
The language should already be English. Start the installation by pressing “Install Ubuntu”
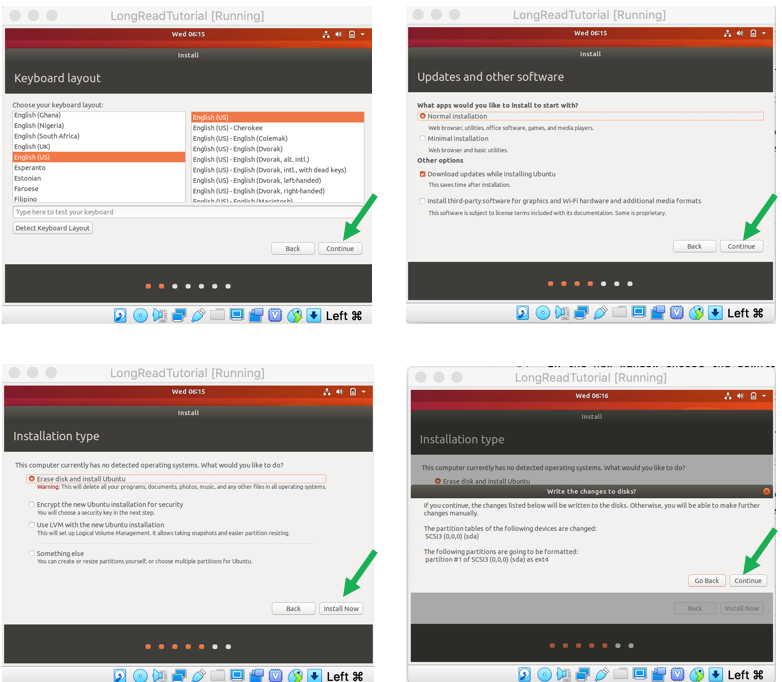
In the next windows the defaults should be ok, so just press “Continue” for “Keyboards” and “Install”. Then press “Install Now” and “Continue” when asked to “Write the changes to disk”
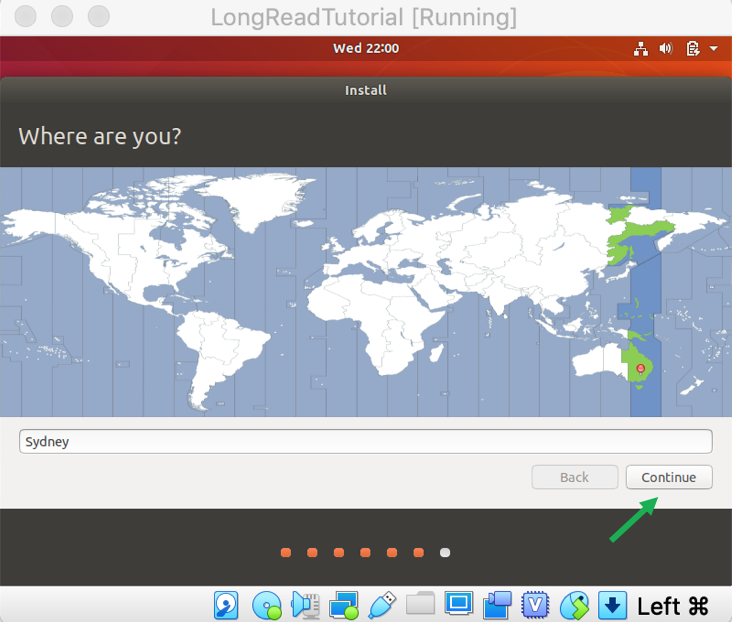
Next you’ll have to configure your Ubuntu. First, set the time zone but clicking on the map and press continue.
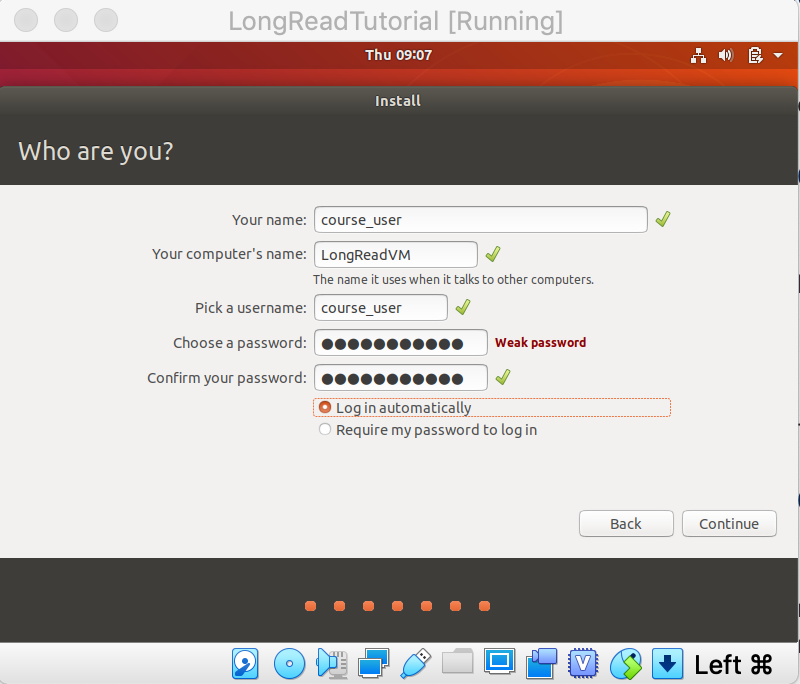
In the next screen you can set your user details. You can configure most values as you like except for the user name: if you change the user name the install script for the tools and packages will not work properly. For simplicity, I recommend setting the name, user name and password all to “course_user”, the computer name to “LongReadVM” and also check the “Log in automatically” option so you don’t have to type in a password on start up. Your window should look like the one below:
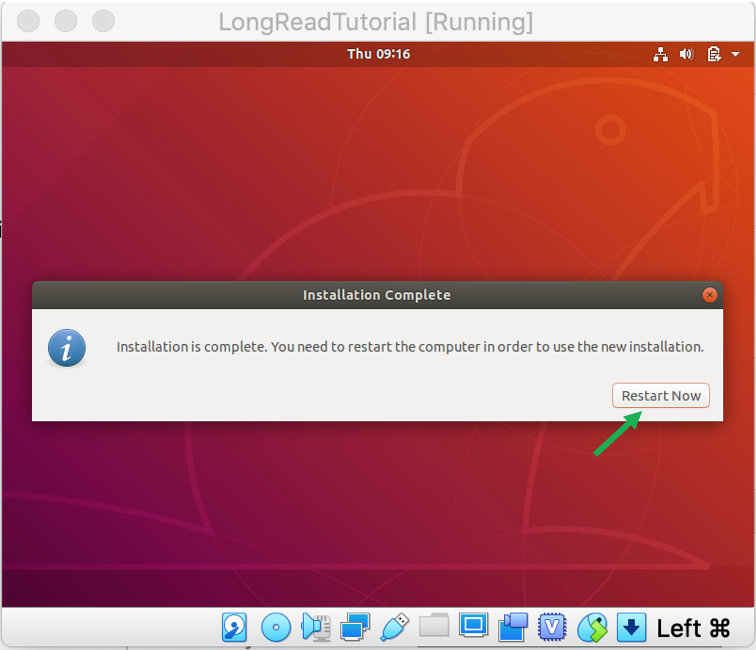
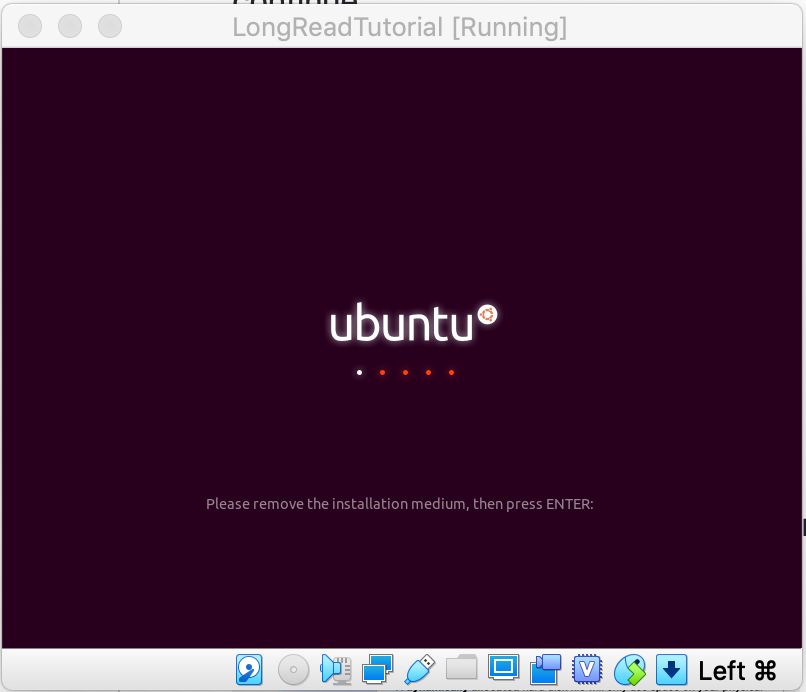
When done press “Continue”. Ubuntu should now start the installation process. This may take a few minutes depending on your computer. When the installation process is done press “Restart Now”. When asked to “Remove the disk” just press “Enter”, VirtualBox will automatically remove it on restart.
Congratulations, you now have a Ubuntu 18.04 Virtual Machine to work with! :)
Next set up the VirtualBox Guest Additions